This is one of the trickiest things that I have done with GMT in a while. The jpeg2000 format is a highly compressed proprietary format, and GDAL isn’t able to convert it. I tried installing a plugin so that GDAL would be able to convert the formats. I followed instructions from KyngChaos (http://www.kyngchaos.com/software:frameworks), but it didn’t work. According to GDAL the only way to get the plugin working is to download the jpg2000 reader from from a third party, and then completely recompile the GDAL setting some switch. Least to say I didn’t want to do this. I decided to convert the one m jpeg2000 using Jasper (http://www.ece.uvic.ca/~frodo/jasper/). This program, although it has limited outputs, was extremely easy to install and got the job done. In this tutorial we will use Jasper to convert the highly compressed jpeg2000 to a spatially located jpeg file, and then used GDAL to convert the jpeg into the three grid files required by grdimage. I downloaded the sample data as one meter resolution orthoimagery of the Snake River near Jackson, Wyoming from the National Map Viewer (http://viewer.nationalmap.gov/viewer/). The rectangle is 2,264 km2 and spans -110.746 to -110.727 longitude and 43.636 to 43.65 latitude. The directory containing the downloaded image file and my c-shell script can be found here.
The first step is to install Jasper. It is easy if you are on a mac. You simply download and install macports and then type:
sudo port install jasper
Once it is installed, we can convert everyting into the right format. The script in the directory is called “SnakeRiver.csh”, and started with my basic GMT boiler script.
1) Convert the jpeg2000 into a spatially located jpeg using Jasper:
jasper -f SnakeRiver.jp2 -F SnakeRiver.jpg -T jpg
The “-f” flag tells Jasper that is the input file. The “-F” flag is the name of the output. The “-T” flag tells Jasper what to set as the output format. In this case it is very IMPORTANT that you name the output file exactly the same as the input file. If you save it as a different name the jpeg won’t be spatially referenced. When GDAL runs it will be using all of the other files in the directiory (fileName.jgw, fileName.j2w, fileName.xml, etc). If you named the output file something else, GDAL will not recongnize the spatial information, and the code will not run. This process also takes about 15-30 seconds, so be patient.
2) Convert the jpeg file into a geotiff file using GDAL
gdal_translate -of GTiff -co COMPRESS=JPEG -co TILED=YES SnakeRiver.jpg SnakeRiver.tiff
3) Convert from Latitude and Longitude into UTM zone 12
gdalwarp -t_srs '+proj=utm +zone=12 +datum=NAD83' SnakeRiver.tiff SnakeRiverCon.tiff
4) Extract the red, green and blue bands.
gdal_translate -b 1 -of GMT SnakeRiverCon.tiff SR_red.grd
gdal_translate -b 2 -of GMT SnakeRiverCon.tiff SR_green.grd
gdal_translate -b 3 -of GMT SnakeRiverCon.tiff SR_blue.grd
5) Plot the created netCDF file using grdimage
gmt grdimage -X1.75i SR_red.grd SR_green.grd SR_blue.grd $region $projection $open >! $psFile
6) Add a basemap and close the file
gmt psbasemap $region $projection -B1000:"Northing (m)":/1000:"Easting (m)":WSen $close >> $psFile
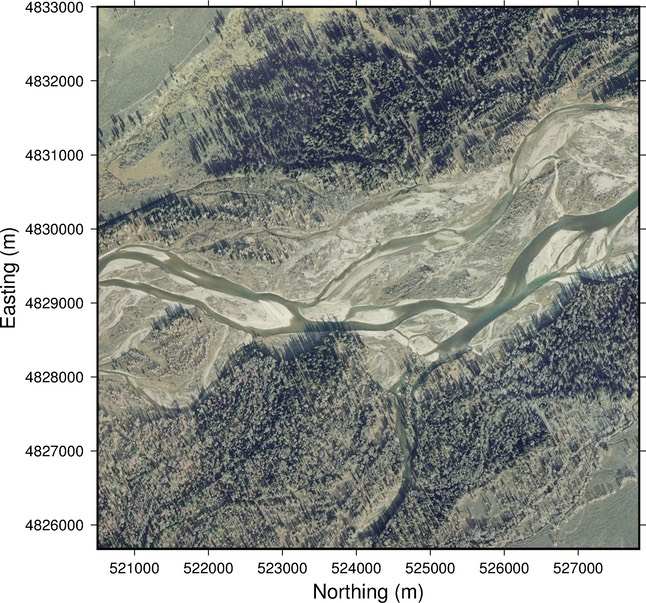
This is the final image created by GMT. This map now has all the wonderful GMT labeling capabilities